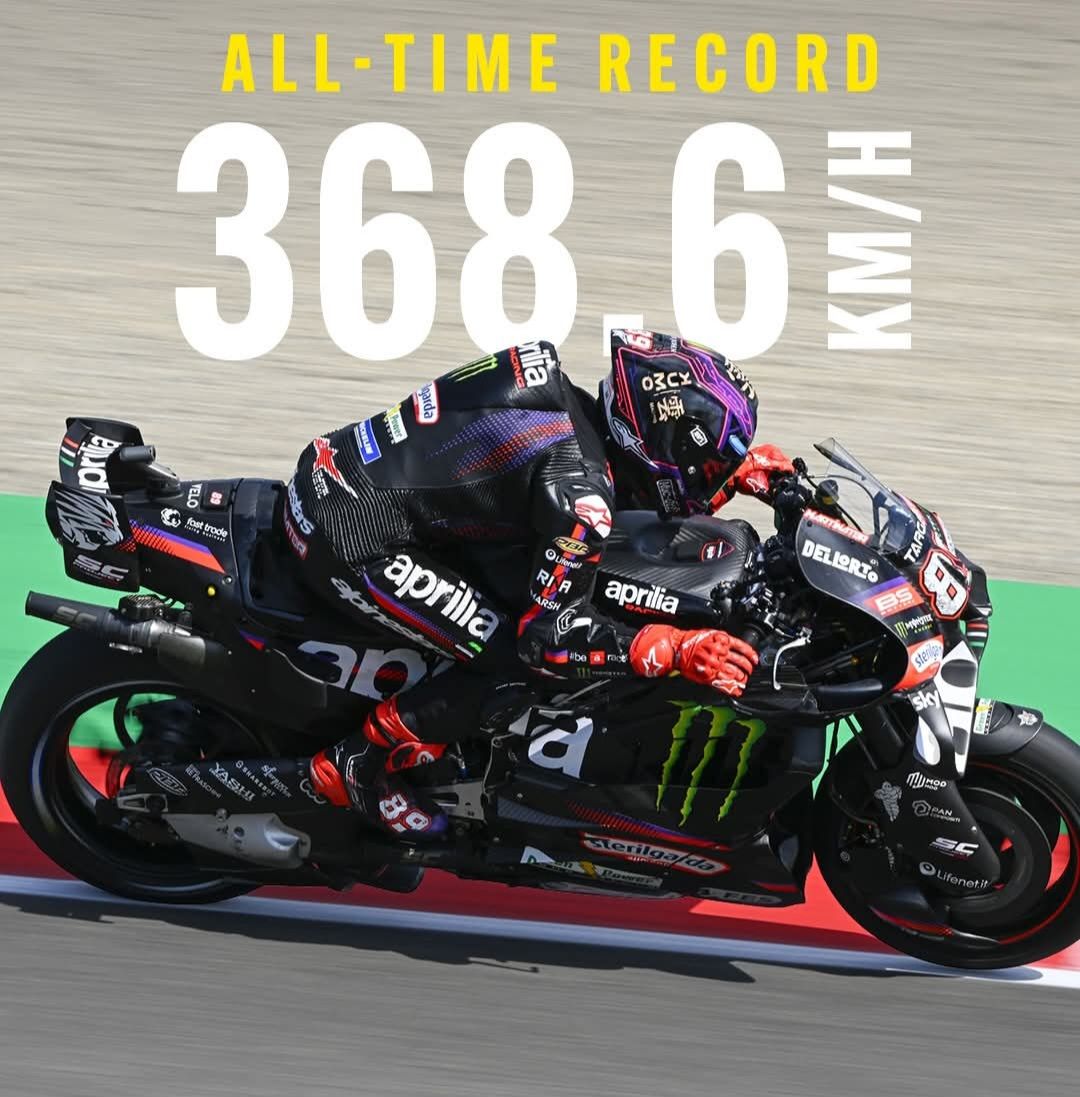
The KTM 1290 SUPER ADVENTURE S is the fastest way to cover large amounts of ground without compromising comfort or composure.
Whether you’re charging off to distant horizons or smashing out laps on a beaten up, abandoned racetrack, this insanely powerful traveler is sure to raise the thrill level as you attack the road in front of you.
There’s a moment on every journey when you are faced with a decision - continue down the path of least resistance or charge off into the unknown and let the adventure really begin. For KTM Adventure riders there's really only one choice - the more daring option!
Join us for an epic journey as we reveal all our latest ADVENTURE models - stage by stage.
The Norden 901 is an exceptional adventure touring motorcycle.
Powered by a smooth and torquey 889 cc parallel twin engine housed in a light steel trellis frame, the Norden 901 is the complete long-distance travel package. Offroad ready suspension with long travel will take you across the terrain you wish to traverse, while comfortable ergonomics make every journey an adventure – not a trial.
Explore the world your own way with the new Norden 901.
Installing mx graphics is a simple process that can be done in just a few steps but precautions are recommended and the old saying, measure twice, install once comes into play when installing decals.
There are two methods of installing mx graphics - wet mounting and dry mounting.
Wet mounting is generally considered an easier method because it is more forgiving in the mounting phase and the adhesive will not have the initial tack and adhere to the surface as quickly.
We DO however recommend the dry mounting procedure due to its benefits of longevity and on some parts, the initial tack is required (especially on convex and concave areas).
1) Start by cleaning the area where the graphic will be applied with a mild soap and water solution. This will remove any dirt, grease, or other debris that could prevent the graphic from adhering properly.
2) Once the area is clean, dry it completely with a soft cloth and be mindful not to leave any residual chemicals, soap included (as this will interfere with the adhesive).
3) Peel the backing paper away from the mx graphic, being careful not to touch the adhesive side of the graphic. We also recommend taping each part up beforehand just to get a sense of direction, alignment and the general idea of where to start.
4) Position the mx graphic in the desired location and gently apply pressure to adhere it to the surface. We recommend starting either from one side and working your way across or from the middle and going outwards to each side.
5) Use a soft cloth or a squeegee to smooth out any bubbles or wrinkles.
6) That’s it! Your mx graphic is now installed and ready to show off.
For more instructions and tips, head on over to our mounting and installation page hereor have a quick look at the videos linked below.